I hope that you have found Techniques Part 1 helpful. If you have mastered the circular stroke then you are well on your way! In my opinion that is the most important one to learn. I didn’t let you in on my little secret because all of the strokes will come in handy at some point whether you use graphite, pastel, or colored pencil.
Part 2 of the Techniques lesson is a little random, but still it’s information that is important in getting started with colored pencils.
Erasing
Which do you want first, the good news or the bad news?
The bad news is colored pencil can not be completely erased. You can lighten the marks a great deal, but a slight tint will still remain. That’s not to say that you shouldn’t try to remove mistakes, but be very careful, very gentle and keep in mind, that you will probably destroy the tooth of the paper before you remove the pencil in its entirety. Keeping your layers light will help in removing mistakes because a light layer is usually sitting on top and not in the tooth of the paper.
And I don’t have any good news except making big boo boos may force you in to being very creative in making them less noticeable. The types of eraser excellent for colored pencil are:
1) A kneaded eraser – Stamp the eraser on the mistake will lighten color. By stamping, I mean roll the eraser in a ball and hit the offending area gently. Poster Mounting putty works well too.
2) A battery operated eraser – IS the bee’s knees! It’s a little rough on the paper so go easy. Excellent for negative drawing, highlights, and whiskers.
3) Removable scotch tape – It’s not an eraser, but it works well in removing color. Gently place the tape on the color you wish to remove and then color with a pencil in the area on top of the tape in which you want the color removed. Remove tape.
****F.Y.I. If working on black paper ALWAYS ALWAYS ALWAYS use a black eraser. White, red, or gray erasers will actually stain your paper the eraser color.
Impressing
 Is the best way to produce clean lines in artwork, for example: Animal whiskers, veins of leaves, and feathers. If you want white lines, then this should be the first step. But, if for example, you have a leaf with light green veins. First, you color the area in a light green (or a light green mix), impress your lines, then proceed to your normal painting.
To impress, place a sheet of tracing paper on your drawing. Use a 2H or a 4H pencil and with heavy pressure draw the lines that need impressed. Remove the tracing paper and paint your art as normal. You should have clear lines as if by magic 😉
Don’t use such heavy pressure that it cuts the tracing paper.
***F.Y.I. Impressing your signature, is great to use with a dark background.
Sgraffito
 Sgraffito is a technique used to scrape out a color revealing the color underneath using an exacto knife. The wax in colored pencil is soft and it takes very little effort to scratch out color. It is used for scraping out lighter grass, veins of leaves, hair etc. Keep in mind the paper has to be pretty saturated with color for this method to really be useful.
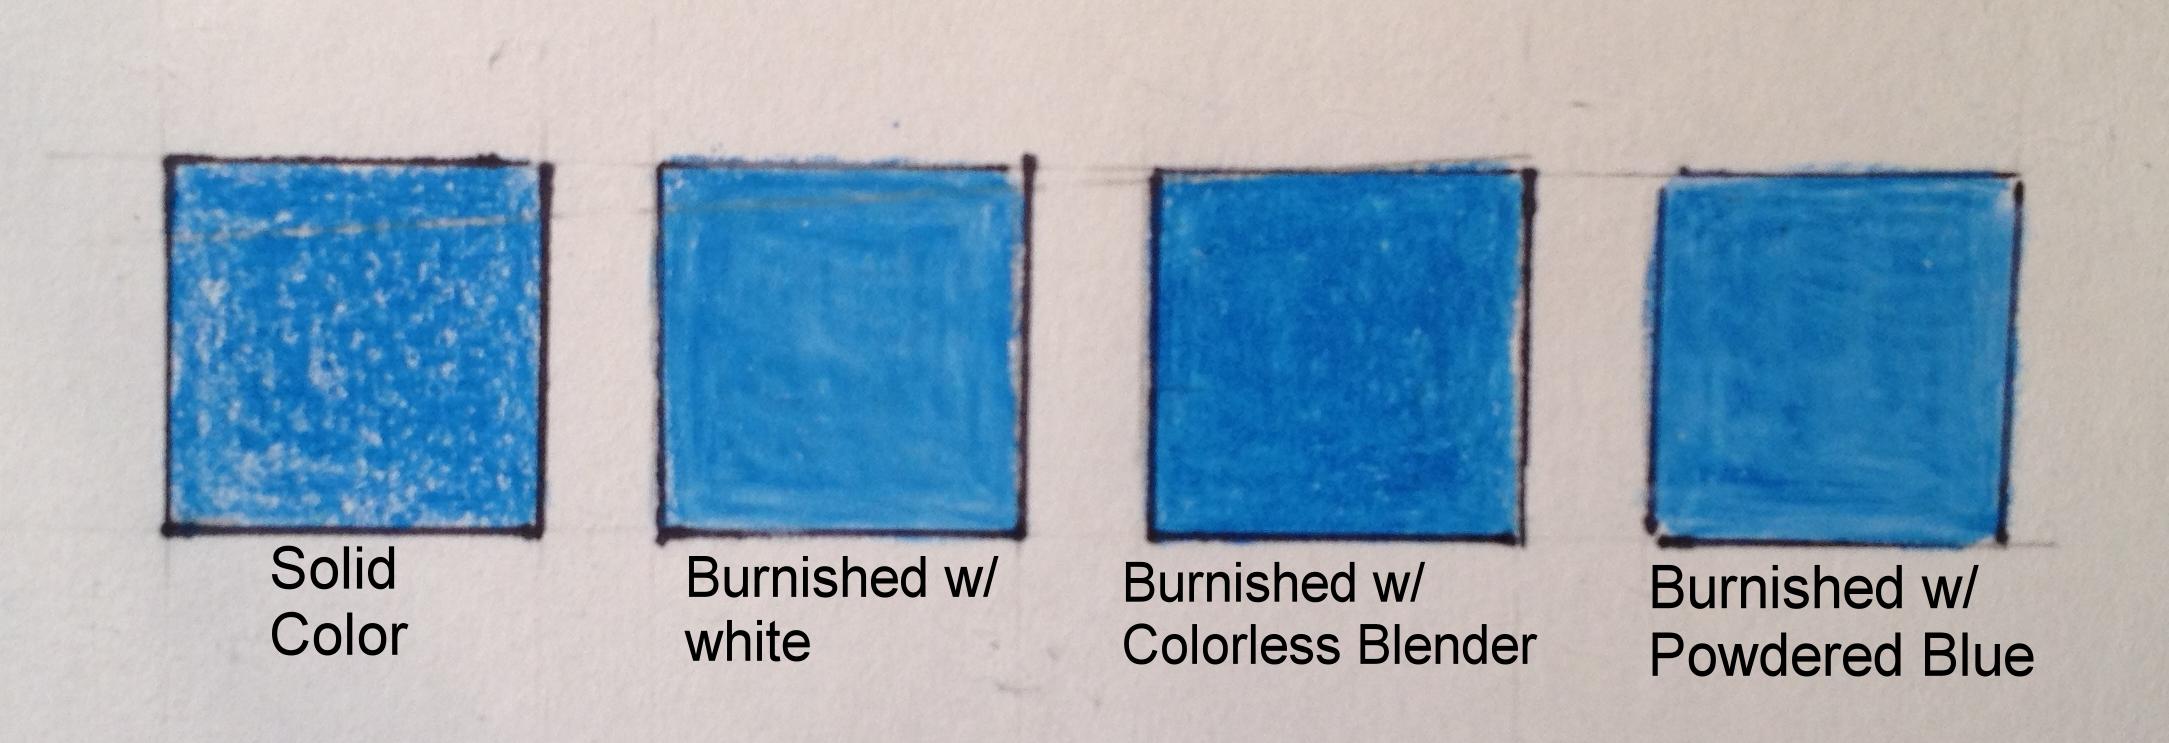
Burnishing
 Burnishing is used to give your art a shiny appearance such as metal, glass, some fruits and vegetables etc. It is the very last step because after you burnish it is rare that you can layer more color on top of the burnished area.
To burnish is to use heavy pressure and saturating your paper with so much pigment and wax that it obliterates the tooth. The artist can burnish many different ways, such as using a paper stump, a colored pencil of a different color and a colorless blender. A colorless blender is a wax based pencil with no pigment.
Blending
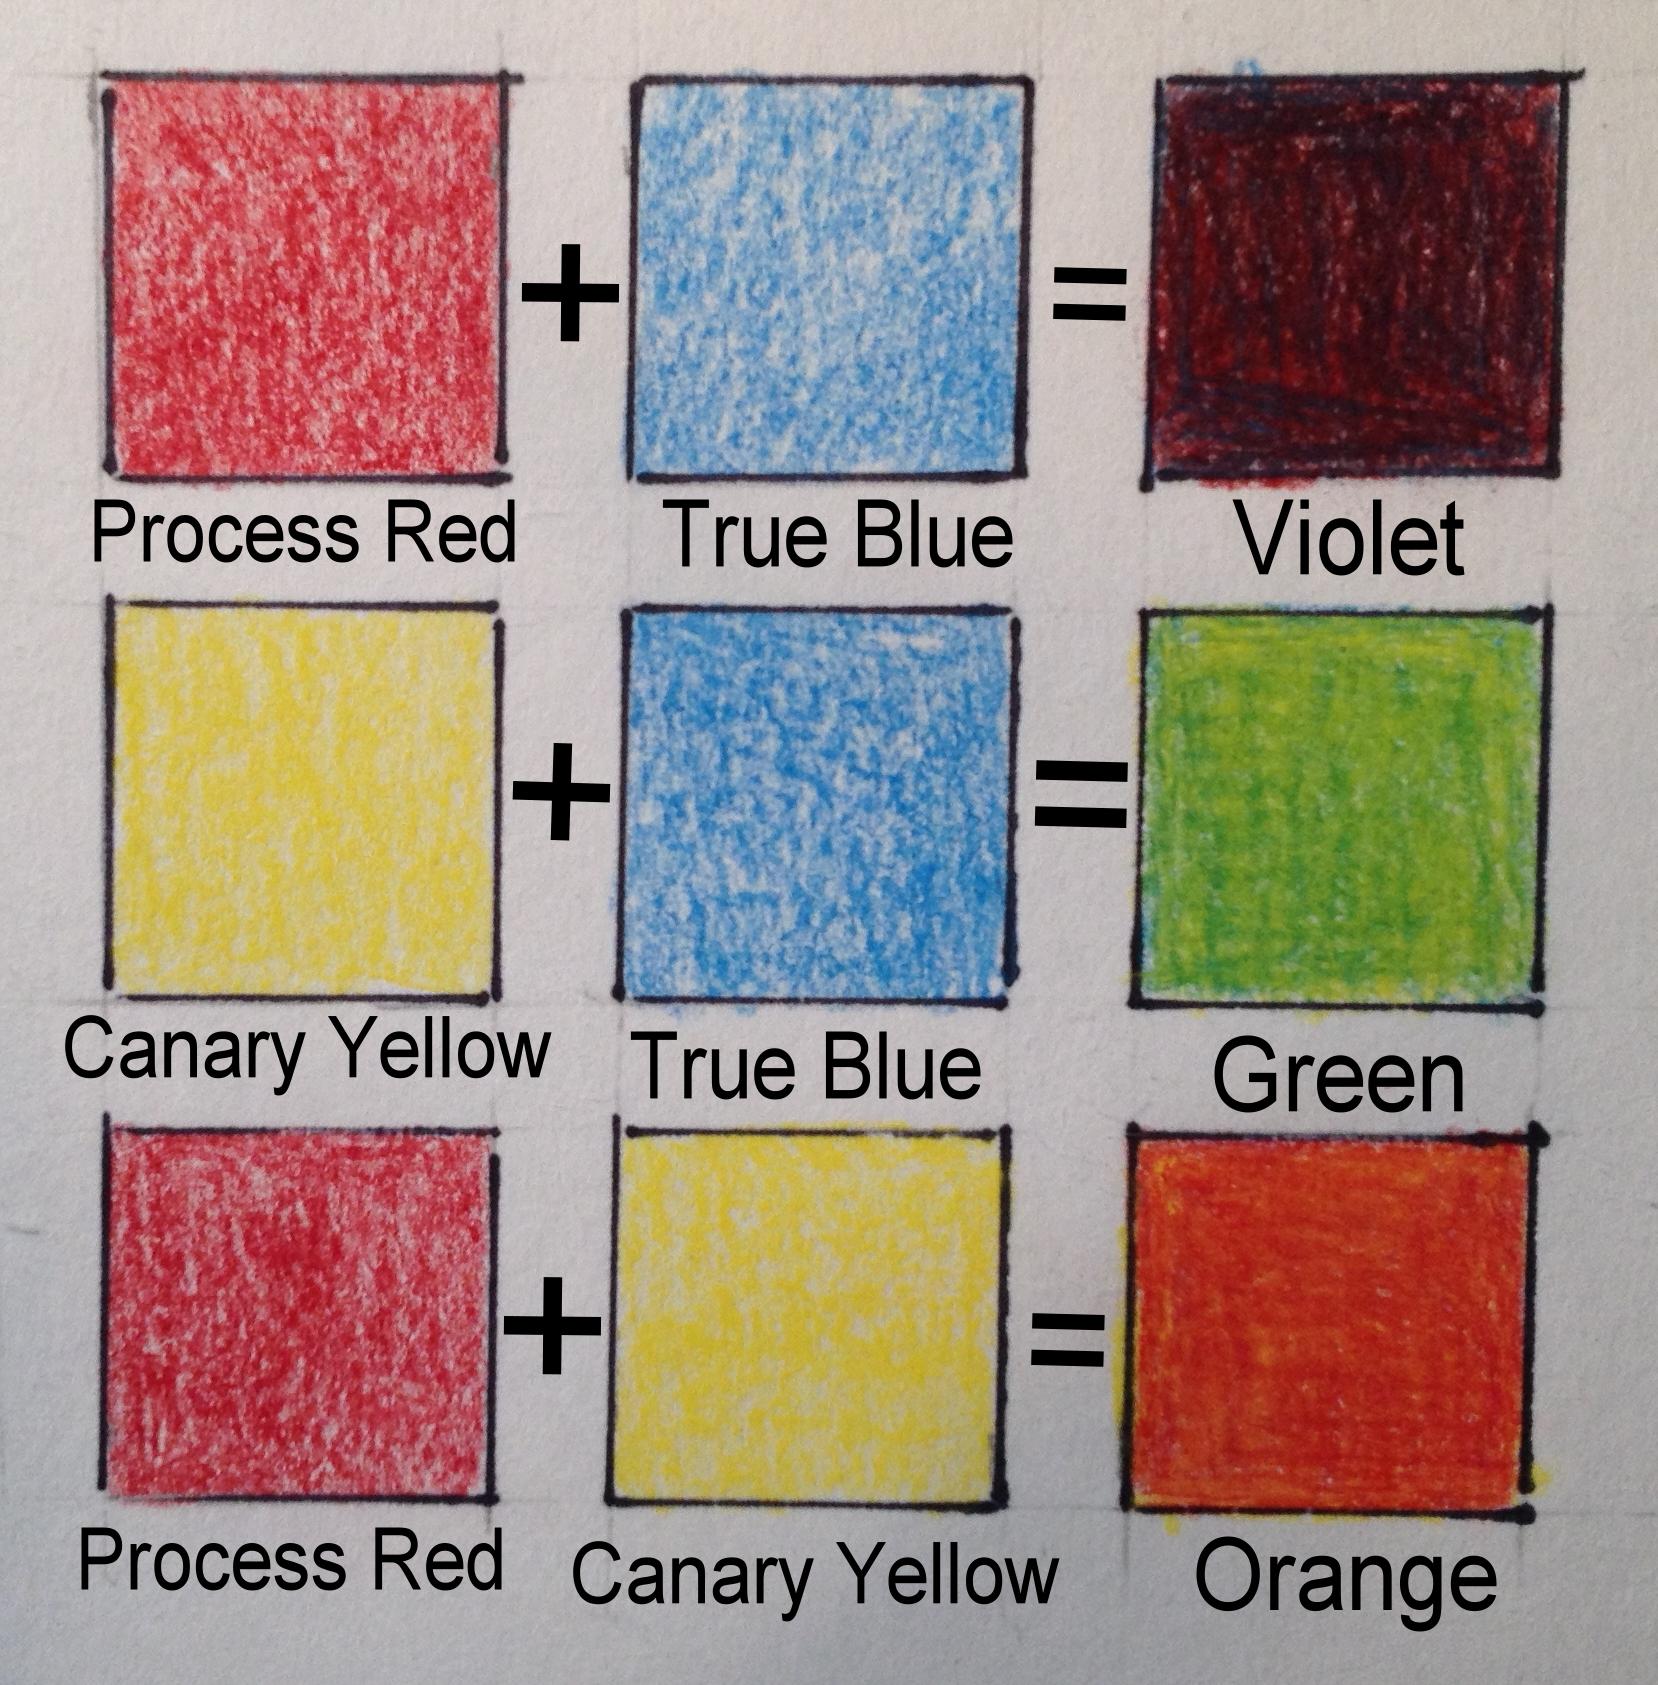
 Unlike acrylic, watercolor and oil which is mixed in a palette, colored pencil is mixed directly on paper. To blend you can either use the Colored Pencil Strokes from the previous lesson or just lay the pencil point on its side to achieve even coverage. And in the blending of two or more colors, is where your knowledge of color theory may come in handy. You can also blend with solvents such as:
1.) Gambasol – use with a paint brush, q-tip, cotton pad or paper stump in a well ventilated area.
2.) Prismacolor’s Clear Blender – It’s like a clear magic marker. To keep the tip clean between colors and after use, mark sides on a clean piece of white paper. If you do not do this step, your marker is stained with the previous color and ruined.
This weeks lesson:
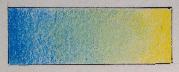
1.) One and Two Color Graduations.

 Starting with a sharp point and heavy pressure, saturated one end of your rectangle with color. As you progress toward the middle use lighter pressure and fade out. (If you are having difficulty, try moving your hand up the pencil shaft)For two color graduations fade out 2/3 of the way through. Then, on the opposite side start the other color. (The samples above are True Blue, Process Red and Lemon Yellow.)
On your drawing paper draw many 3/4 x 3 in. (approx.) rectangles and in each rectangle Paint one color graduation and two color graduation bars using colors from the color wheel.
2.) Take a trip to Lowe’s, Home Depot (or maybe Walmart) and pick up paint chips in Flat. Semi Gloss, Satin or Gloss are too distracting. Pick up as many different samples as you can.
Also See:
Color Theory and the Color Wheel
Color Techniques Part 1
Until next week…
Be Well and Happy!


 I added a layer of slate gray. And now I have the depth I need, but it too dull.
 I added a layer of true blue to get the vibrancy back. Remember, In the beginning I chose True Blue because it was the closest.